C H R I S T M A S. There’s nothing I don’t love about this time of the year. Christmas carols, snowflakes falling, reading Christmas books, and carrying family traditions each year through to the next – from watching Christmas flicks to Starbucks Christmas brews! Yes, I L O V E everything that gets crammed into the month of December.
For some of our middles, I recognize that this time of year can be challenging and perhaps isn’t so wonderful at home. Being mindful of this, I try to give middles an opportunity to share in the holiday spirit within our classroom. If they rarely experience the joyful feelings of this season at home, then they may experience the sense of warmth this season brings within our classroom family and school. There are so many festive ways to share in the spirit of this season while still meeting the needs of the curriculum – Christmas Carols (Music), Coding Holiday Games (Math), STEM Christmas Challenges (Science), Holiday Bell Ringers (ELA), Learning about Christmas around the world (Social Studies) and the list goes on and on and on!
One little tradition I started all the way back my first year of teaching in 2003 (OH MY!!), is “Decking the Halls” with Holiday Art. For me, decorating our classroom and school with holiday art is an easy way to spread joy to others. Not only is it incredibly relaxing to watch middles create but seeing their faces light up as they hear the “Ooos and Ahhs” as students and staff walk by to admire their art is rewarding. I’ll never forget one of the littles coming up to me during recess break and saying, “Mrs. Xerri, when I’m in grade 8, I want to make this art!” and when I asked why, this little replied with, “…because, when I walk through the hallways it is the happiest part of my day!”. Speechless 😥. That right there is why we all do what we do teacher peeps – to give kids joy throughout their day!
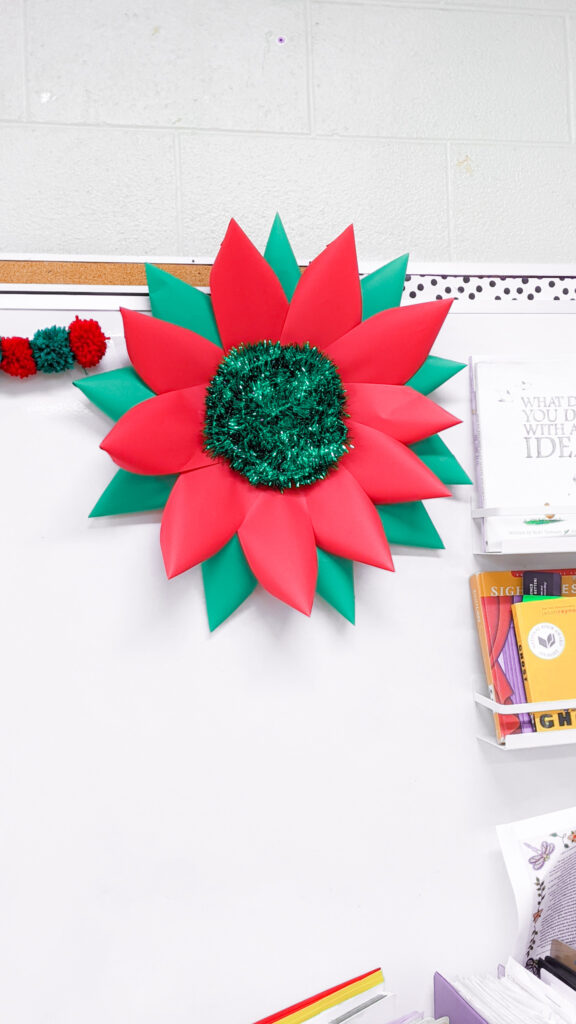
One easy and quick, art project I do every year is Holidays Wreaths. I absolutely love this activity because each and every middle has an opportunity to feel a sense of success. It also makes for a beautiful keepsake for their home. And did I mention how EASY it is and with FEW supplies needed – Yipee!
Let’s Get Started!
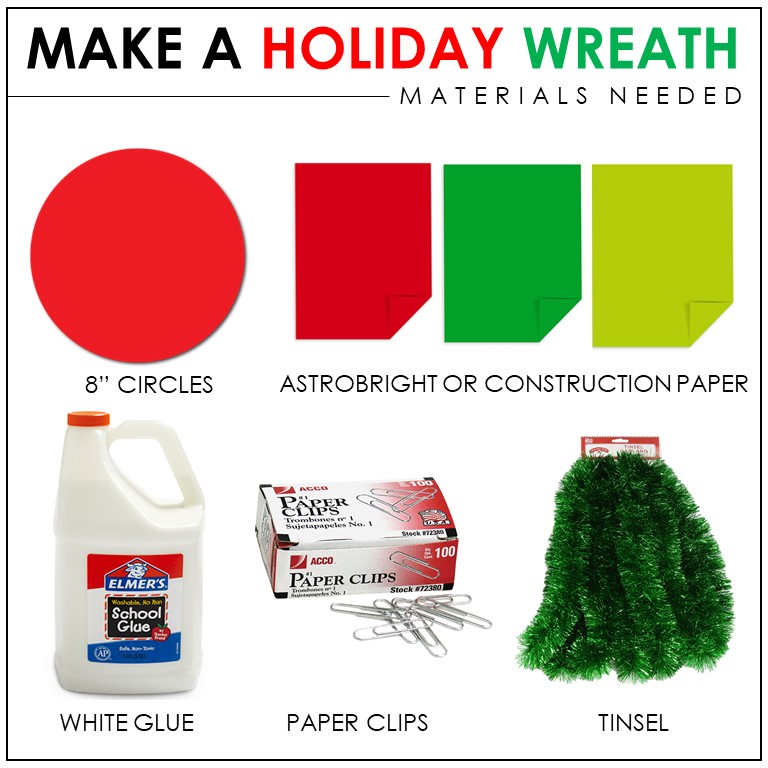
- 8″ Circle Cut Outs
- Astrobright or Construction Paper
- White Glue
- Paperclips (Large)
- Tinsel
- Staples (Optional)
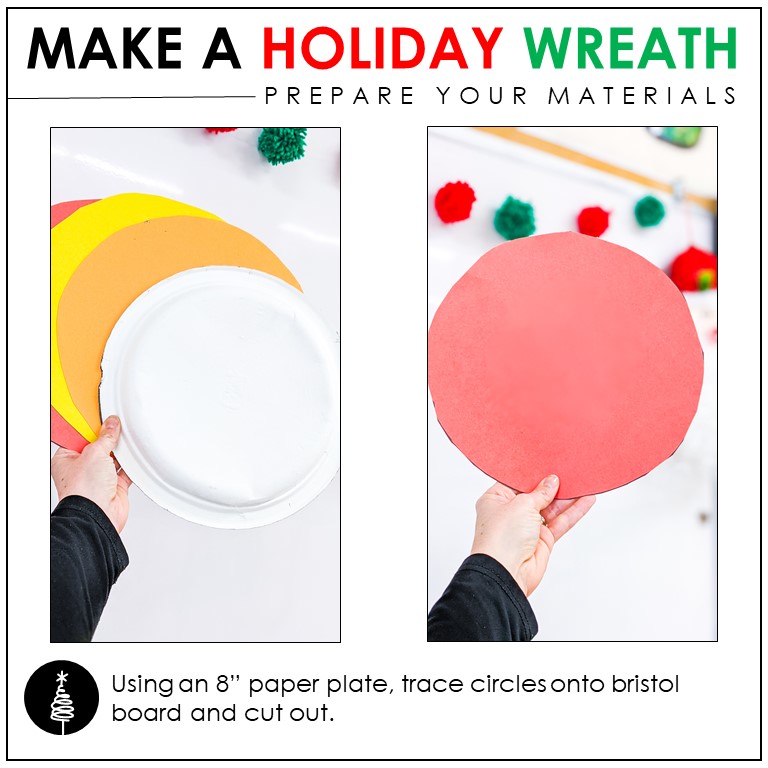
- Trace and cut out circles. I used a paper plate to trace the circles onto Bristol board for the base of the wreath. They do not need to be perfect nor does it matter what colour the Bristol board is, as they will not show once the wreath is complete. TIP: To save time, I had a few of my students volunteer to stay in at recess and prep the materials for our class.
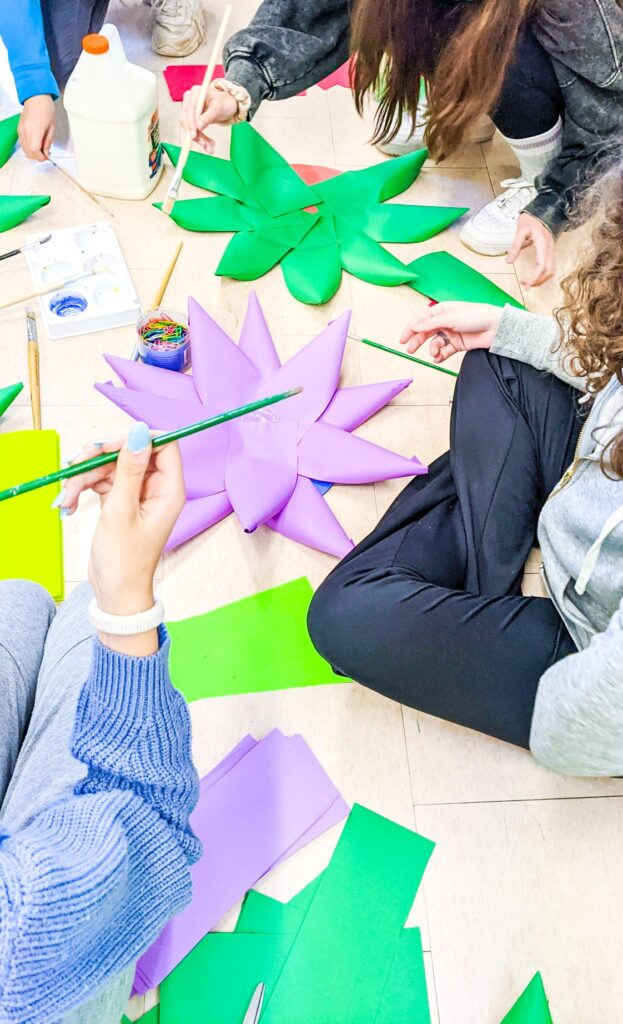
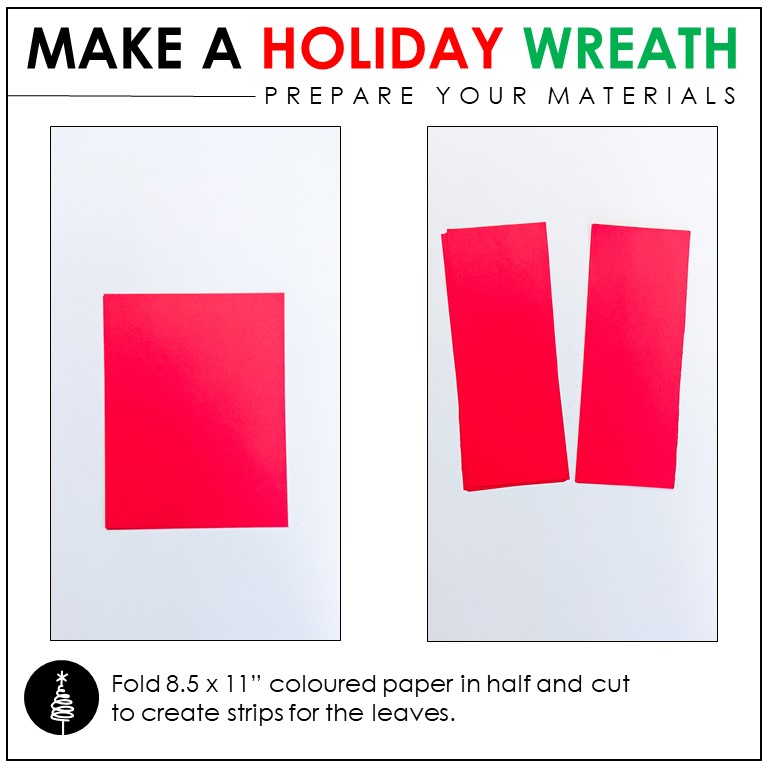
2. Prep the paper for the leaves. These wreaths look amazing in any colour, however, I often encourage middles to choose holiday/winter colours or since I teach in a Catholic school, they also could choose the colour purple for Advent. Whether you use construction paper or astrobright paper, prepping the paper is easy! Simply fold the paper in half and cut down the middle. Students can then choose which paper colours they would like for their wreath.
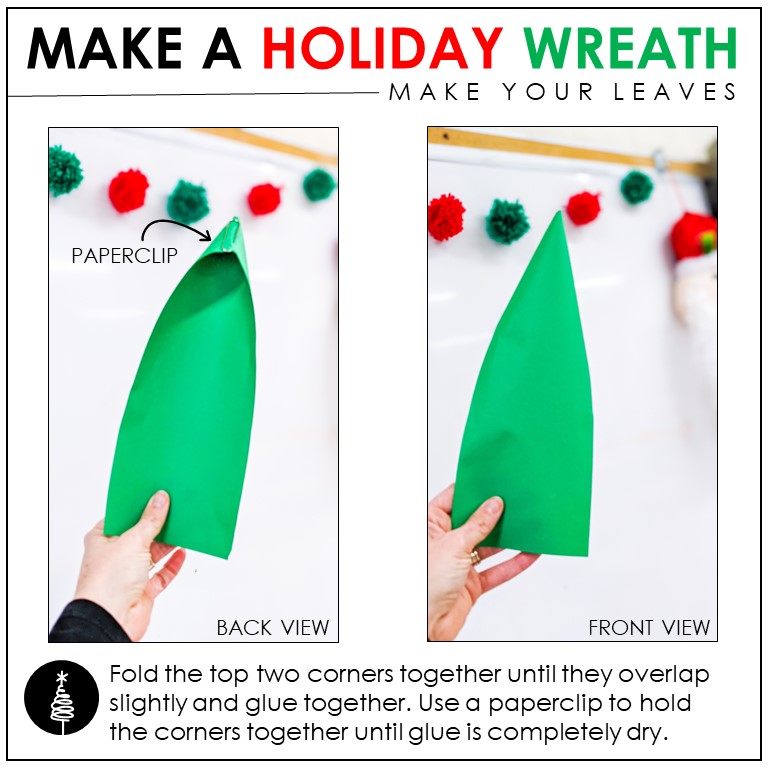
3. Make your leaves. When making the leaves for your wreath, fold the top two corners together until they overlap slightly and glue together. Use a paperclip to hold the overlapped corners together until glue is completely dry. NOTE: In the past I have also stapled the corners of the leaves together, therefore, this is an alternative option should you choose to forego the glue.
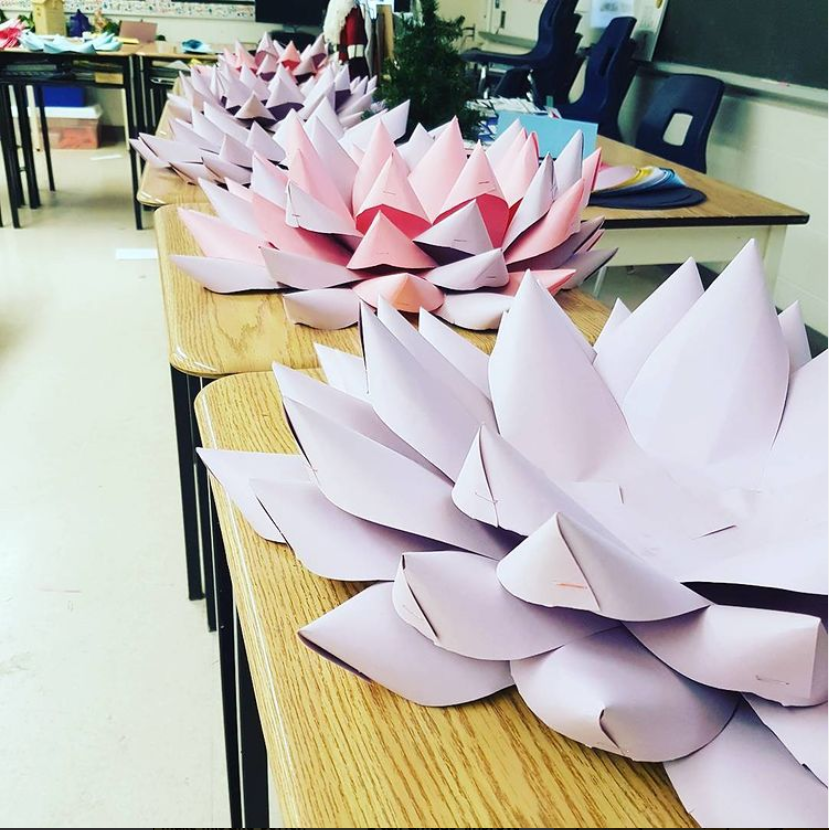
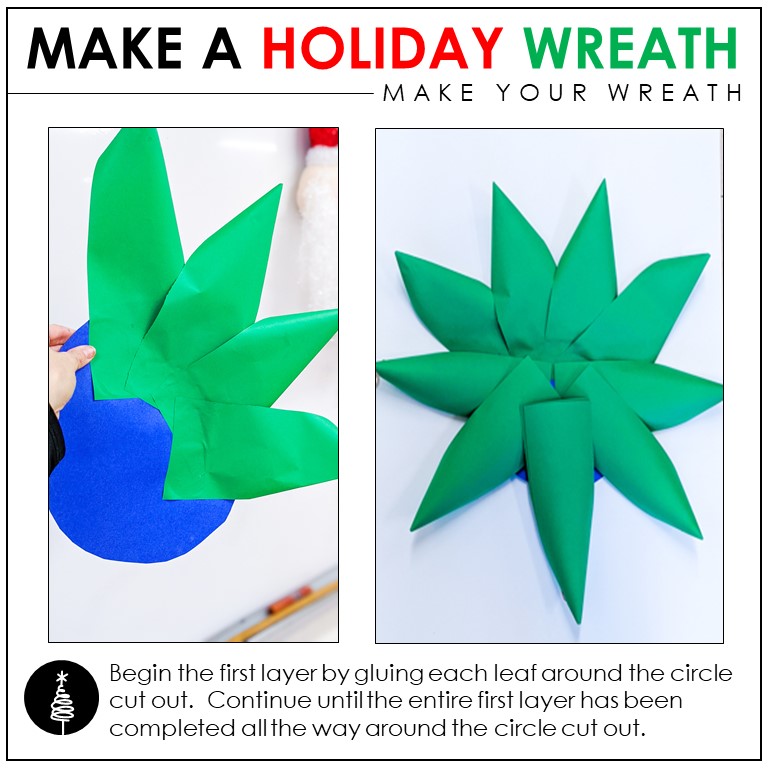
4. Make the first layer. With your choice of coloured paper, begin the first layer by gluing each leaf around the circle cut out. Continue until the entire first layer has been completed all the way around the circle cut out. Try to ensure that the leaves are evenly distributed around the circle.
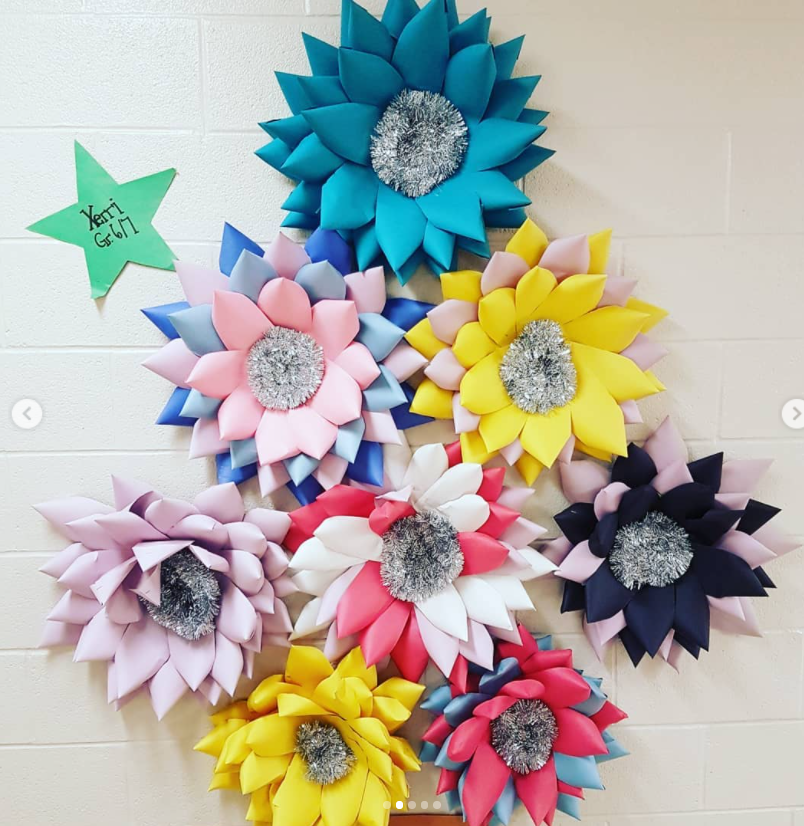
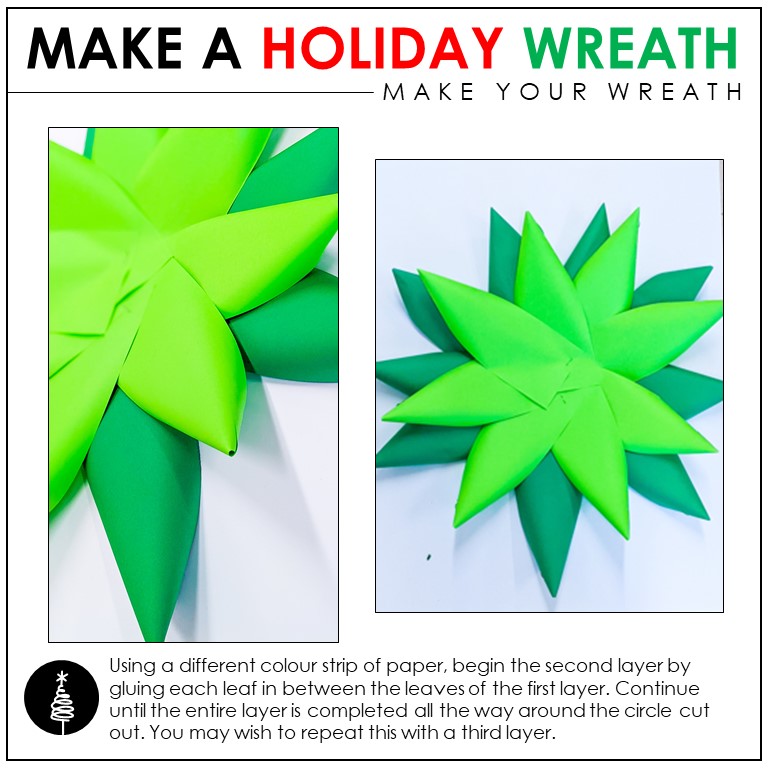
5. Make the second layer. Using a different colour strip of paper, begin the second layer by gluing each leaf in between the leaves of the first layer. Continue until the entire layer is completed all the way around the circle cut out. You may wish to repeat this with a third layer. NOTE: I recommend choosing different colour leaves for the second layer. This helps give your wreath dimension, however, if students wish their wreath can be all the same colour.
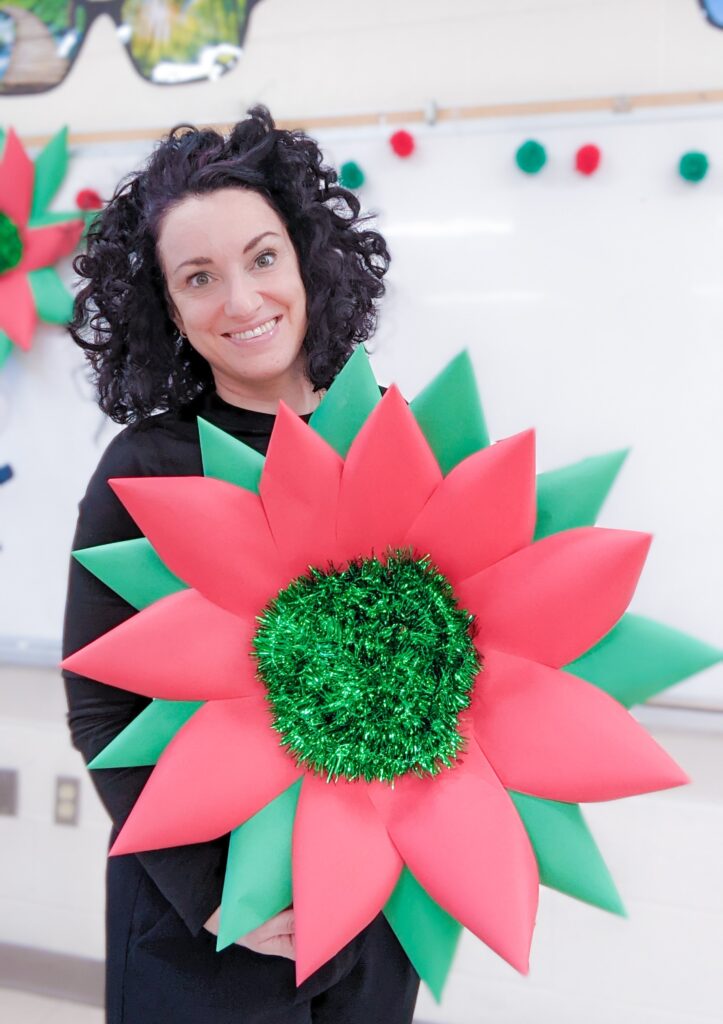
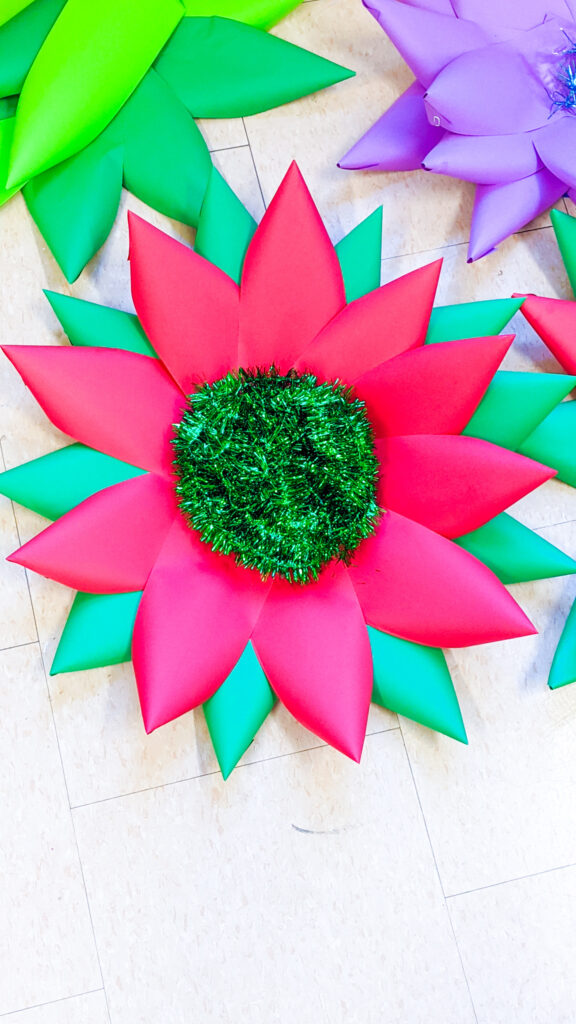
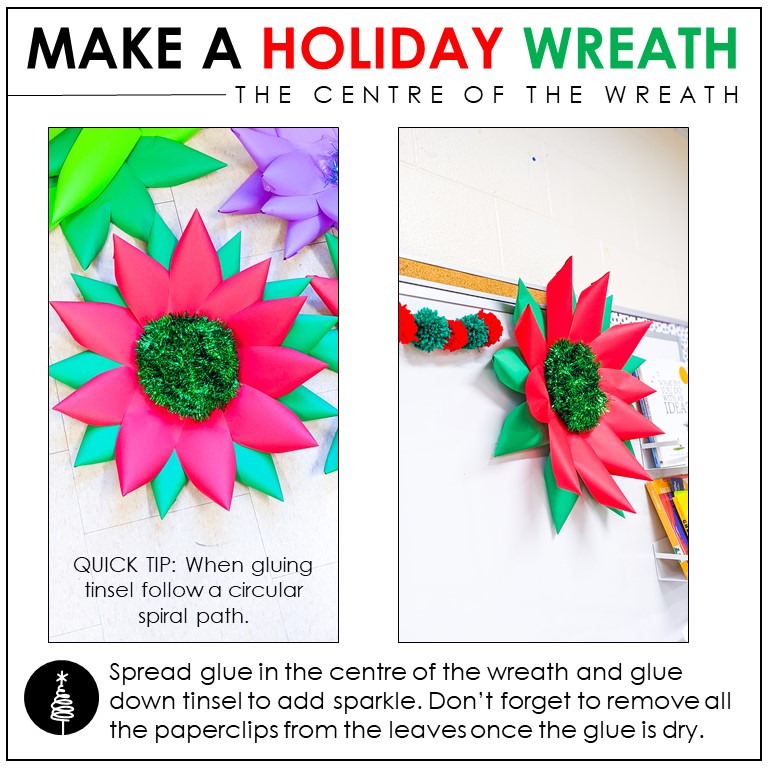
6. Add the centre. Choose any colour tinsel for the centre of your wreath. Begin by spreading glue in the centre of the wreath and glue down tinsel to add sparkle. I recommend having the wreath dry overnight in your classroom. Once dry, remove all the paperclips from the leaves.
Whether you’re planning on hanging the wreaths on your classroom door, around the school or even at home, I know that you and your middles are sure to love it! Enjoy xo